Tihana Red Wine 2019

21.2.19

  • Frozen grapes from last year’s harvest, 8L must, including skins this time.
  • Initial acidity 6.5ppt (needed to add 6.5ml of NaOH to test kit)
  • Initial SG 1.048, adding 250ml water and 1kg sugar to bring SG to 1.100
  • Added 2t grape tannin

22.2.19

  • added whole packet of R56 yeast, stirred in with potato masher, inserted bubbler
  • kept muslin inside 30L container
  • plan is to stir twice daily for a week. Or so.

02.3.19

  • stopped bubbling

06.03.19

  • transferred to carboy .   4-5 litres
  • SG of 0.093 = 15% abv
  • tastes tart but decided to let it mellow by itself


Dad’s second wine: Tihana Tipple II

Just notes for while we’re making it:

  • 12.2kg of frozen black plums, already cut into small pieces before freezing
  • 1.2kg frozen black currants
  • 5kg white sugar
  • 500g honey, bush blend from Tihana
  • 100g CaCO3 to the must directly
  • 40g oak chips (Hungarian Oak No 1 Toast, for rum and dark spirits)
  • Made up to 27L with boiling water

… all into primary fermenter.

Made to basic plum recipe as previously:

Sunday morning: Boil water and sugar/honey. If using honey, skim the scum.  Wash, stem and pit the plums. Cut into small pieces saving the juice. Put into straining bag in bottom of primary fermentor and mash.  Pour hot sugar water over fruit and fill up to 1-gallon mark.

Sunday afternoon: Mash up fruit some more … When cooled, add acid, tannin (strong cup black tea, 3bags), yeast nutrient and crushed Campden tablet (1 per 5L must). Cover and fit with air lock.   DONE

Monday: After 12 hours add the pectic enzyme. Actually, it was about 15 hours.

Tuesday: TAKE SPECIFIC GRAVITY and record on the Brew Records page.  24 hours after adding pectic enzyme, add yeast and stir.

Following Tuesday: Remove straining bag after a week. Specific gravity reading .20 on 30 January

When must reaches specific gravity of 1.030, rack to secondary fermentor.  Rack again in 2-3 weeks.  Rack again in 2-6 months.  After it ferments out, stabilize with Campden tablets or stabilizer and add 2-6 ounces of sugar to sweeten if needed.  Bottle and age 6-12 months. Specific gravity on Feb 9 is .100

Tihana Tipple: Dad’s first wine

Mum and Dad grow red table grapes, and, because of the sporadic harvest and birdy presence, froze the crop as it came on.  We thawed the grapes to make the must, but unfortunately, the freezing process made the (few!) unripe grapes just as squishy as the ripe one, which came out in the final taste.  Lessons to learn!

We’ve added CaCO3 to remove the sharpness, and are hoping that the overall taste will improve more with age.

Goosed by the berries

So all is not going according to plan.  I have just 300g of gooseberries, which means I’m fermenting just 195g sugar in 600mL water with them.  Not even enough for one bottle 😦 … a whole 0.15 times this recipe.

So we’ll change tack and go for something closer to an infused vodka, then use that to flavour the grapes later on.  Probably easier to blend that way!

Recipe:CAM01566[1]

  • 300g gooseberries, frozen
  • 200g white sugar
  • vodka (about 500mL)

I melted the sugar and thawed the berries in a little slosh of vodka over a low heat.  Once they were thawed enough to be mashable, I pierced them and mashed gently with a fork.  I poured the mixture into a 1L mason jar and filled the rest with vodka.  They’ll sit in the dark for about a month, shaking a couple of times a day.  Then it will be strained, bottled, and we’ll see how the grape wine is by then for blending.

Update: A few weeks in and I tasted the mixture.  It’s odd.  I hadn’t realised how much I associate the tartness of gooseberries with their flavour until I tried this very sweet mixture!  I’m not sure whether some of the berries have just rotted in their skins and tainted the flavour or whether this is just what they taste like and I never knew … will wait until they’ve been strained off the solids and taste again with caution!


Rose-hips are red …

We’re lucky enough to have three dog-rose tree-bushes in our yard – all neglected, all vigourous, and all producing large quantities of rosehips.  Last year I tried – and failed – to produce rosehip jelly, but this year may have been more successful.  The difference?  Using the blender!  The rosehips are tiny, full of seeds, and last year I followed the instructions to boil them whole.  This year I’ve been working from this recipe from Curious Kai, based on this other one from River Cottage.  I used the reduced amount of sugar (700g/L juice instead of 1kg) so that we can add honey to hot drinks over winter without it becoming too sweet.

(Un?)Fortunately, the final result fitted perfectly into the three bottles I had, so we haven’t had a chance to try it yet.  It smelled like a slighty unusual blend of mango and apricot – not at all like the cranberry flavour I was expecting from the look of them.  I think it would work well with ginger or perhaps lemon – something to cut through the earthy-sweet flavour.

It took about 3 hours total to pick, clean, de-stem 500g, which made about 1L of syrup.  We’ll wait and see what the final verdict is before doing any more – they’re very labour intensive!

Recipe

  • 500g of destemmed, deleafed, de-everythinged rosehips
  • 1L boiling water
  • 350g white sugar
  • tiny dash of vanilla essence

I boiled up the hips whole first, and then let them steep while we were out for a few hours.  Blitzed them when we got home with the stick blender, then brought them back to the boil again.  They’re full of seeds, so I didn’t puree them because I didn’t want the seeds to be crushed, just the flesh to be opened.  Once it was cool enough I strained it through a chux cloth.  As with any jelly, don’t be tempted to squish it at all or your final product will be cloudy.  Just let it sit and drip while you do something else.

Once the first lot had finished dripping, I added a further 250mL of water to the pulp and boiled it up again.  Again with the dripping, until I had about 1L of bright orange, and slightly mango-smelling juice.  I brough this to the boil and reduced it by half before adding the sugar (this way you don’t have to worry about burning it or it boiling over quite so often!).  Added the sugar, and brought to a strong boil for about 5 minutes.  I wasn’t going for jelly, so I didn’t worry too much about the setting tests, I just skimmed the scum off as it came and that was that.  I bottled it into three sterilised, hot bottles and turned them upsidedown to cool and seal.

We’ll know whether it was worth the work when winter comes and we need the vitamin C!

Followup: It tastes great – a cross between mango and apricot, but with a lot of warmth behind it.  It’s still very sweet for the flavour content, so next time I’d cut back still further on the sugar, and/or consider adding some citric acid or lemon juice to give it a bit of tang.  Not too much though, it’s lovely as is already.

A grape day (not my title …)

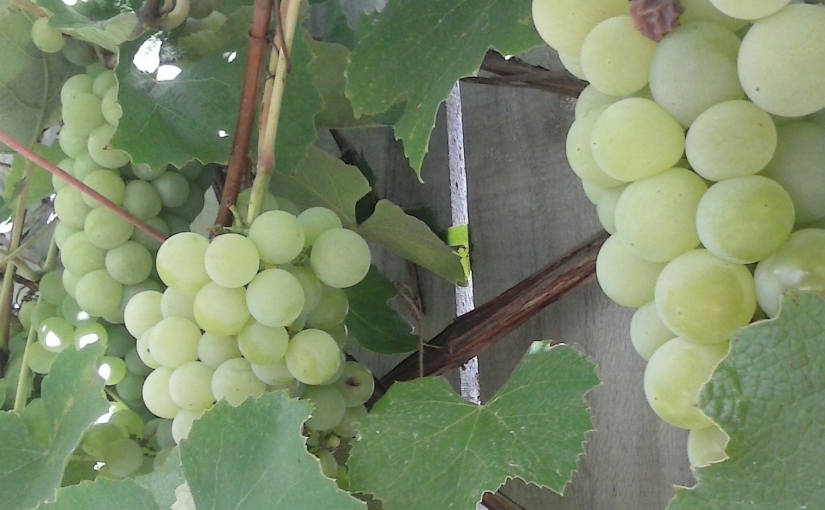
It’s true, it was a grape day.  It took about an hour to fully pick the one vine which runs most of the length of our driveway.  I reckon we lost about half the crop to the birds earlier, but there was still plenty left.  We picked them a bit earlier this year than last, which was good, I think.  Not such a super-strong grapey taste, but still plenty sweet.

About 55L in all – I don’t know the weight because our bathroom scales have broken, and I wasn’t keen enough to weigh them in 2kg-at-a-time batches.

Next it was washing and pulling the grapes off the stems.  I know you can crush them in bunches, but we had just too many for my little filter bag.  A couple of hours of shoulder-deep squash-squishing, and we had 14L of grape juice (oh, and a few kg leftover for young friends …)

I’m using just white grapes, sans skins, for this base lot.  Later, we’ll blend with the elderflower or the gooseberry (still picking those … watch this space).  I’ll also use this recipe, and adjusted the gravity to suit.  My juice had an SG of 1.054 to start, so I added about 1.5kg of sugar to get it up to 1.095.  Being a bit of a geek, I used the calculations on this site to make my own metric sugar-addition calculator (No responsibility for calculations … they’re rough but they gave about the right SG after adding and retesting).

I didn’t have the means for testing the acidity, so have left that as is for now.  With the other wines I’ve made, I’ve added calcium carbonate very late in the fermentation, and then gave it a few days more to settle before bottling.  So far that’s worked ok, but I guess that the operation of the yeast might be affected by the pH too, so perhaps it would be better to test and adjust earlier on instead.

I’m using a slow fermenting yeast, CY17, which is (apparently) good for white dessert wines.  Let the bubbling begin!

2.3.17 update …

The bubbling … yes … the bubbling …

Turns out the bubbling was so strong that it popped the top off our primary bucket, allowing outside contamination.  A couple of days later I noticed a dozen or so bright orange spots – 5-10mm diameter – on top of the yeast foam.  Not anything I could do about it, so I’ve closed it up properly (with the help of some heavy books full of light reading piled on top…) and now we just have to hope for the best.  If it’s an aerobic bacteria, then it should be killed by the CO2 flush from the rest of the yeast (which is still very active).  If not, well, I can only hope it tastes ok.  Either way, we just have to wait and see as I don’t want to open it again to check and risk recontamination.  Sigh.  Most of the time I like the waiting, but not like this 😦

cam01565.jpg


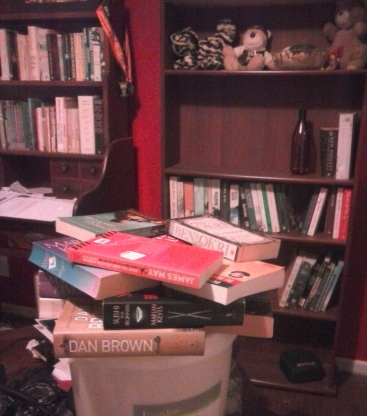
I’ll just leave this here for posterity … if it’s not fair to judge a book by its cover, then is it fair to judge a person by the covers which they use to weight down a recalcitrant wine primary? Truly, a question for the ages …


Flower power

Last weekend the lawnmower got an unexpected reprieve (how is it that going to the petrol station for 2L of gas feels as improbable as scaling Mt Everest equipped with only a toothbrush?), and the jungles of dandelions with them.  I wasn’t going to do dandelion wine this year – it’s fiddly and there’s no shortage of other stuff to make – but with this kind of abundance it seems a shame to just mow them down.

I found this fantastic list of flowers for winemaking – how many are a) drinkable, and b) easy to source in the required bulk, I’m not sure about.  But the seed of an idea, all fluffy like a dandelion, has been planted …


Gooseberry and elderflower

So while bird-netting might trump birds, it would seem that a car wing-mirror beats bird-netting.  Sigh.  I guess that’s one of the downsides of having a driveway vineyard.

This weekend we’ll pick a bunch or twenty of the grapes and use them as a base for two white wines – one to be flavoured with some leftover elderflower cordial, and the other to blend with some caped-gooseberries, of which we have legion.

Quite coincidentally when googling for “gooseberry wine” I found this link, though it uses British wild gooseberries and not the caped variety I have.  I’ve never tried them so not sure I’d risk mixing the two fruits at this stage.  The same post is part of a larger series, titled “Homebrew from the hedgerow” which has some delicious and slightly nostalgic recipes to look forward to.  According to google, I can substitute cape gooseberries for their naked cousins quite easily, so I’ll just go with that.

The good folks at Brewers Coop have sold me some AW4 yeast for all the components of this white combo – today, just the elderflower to start with, tomorrow, the grapes!  I’ve been having to freeze the gooseberries as they come so that I get a big enough batch to work with.  I suspect this may take a little while longer!

Starting gravity of 1.050 for the elderflower, so only about 7% if it ferments all the way to 1.0.  Not too worried about that, as this will be blended with the grape base and probably fortified later too.